This shop has been compensated by Collective Bias, Inc. and its advertiser. All opinions are mine alone. #SToKCoffee #cbias #CollectiveBias
I grew up in the suburbs of Connecticut. Our house wasn’t too far from several farms and horse stables and I loved going riding or apple picking whenever we got the chance. Although I ended up living in Philadelphia, Manhattan and Los Angeles, I was never a big-city girl. When we moved to Santa Clarita, I felt so much more at home… and when I met someone who actually owned a farm and only lived a few miles from me, I got all those country feelings back again. For me, there isn’t anything better than being out in nature, among the animals, and creating some incredible food. Waking up during the summer with a mug of SToK™ Cold Brew was the perfect way to get on track for heading over to my friend Monica’s farm and making some homemade goat cheese.

Of course, you can pick up goat cheese at pretty much any store these days but, there is something about that farm to table freshness that really can’t be beat.
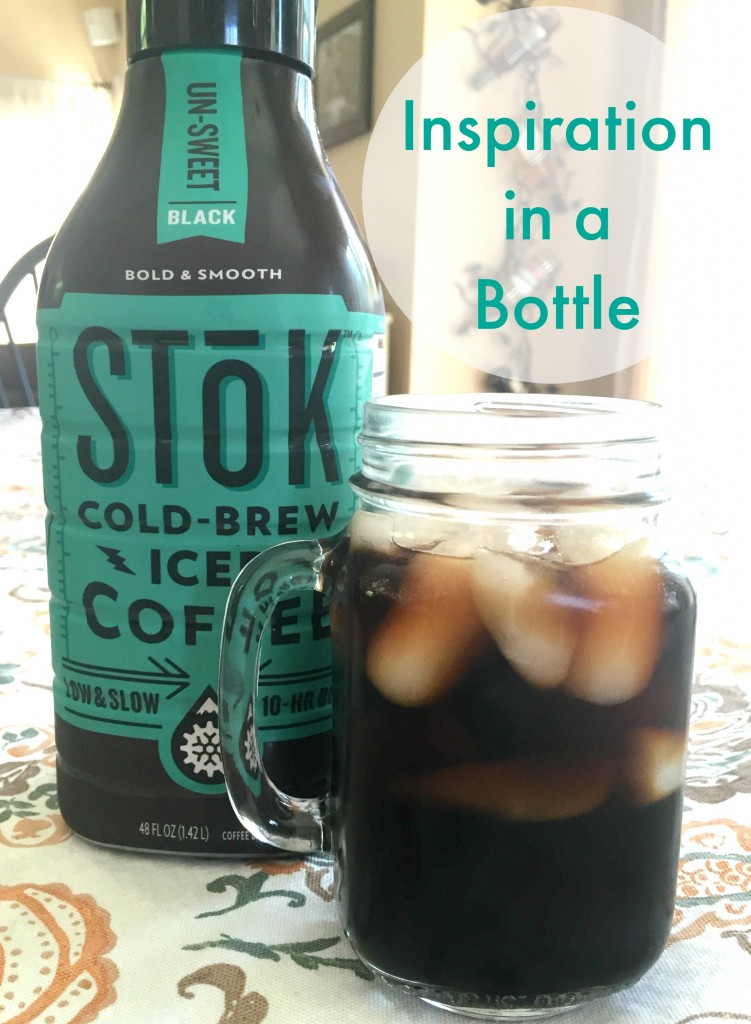
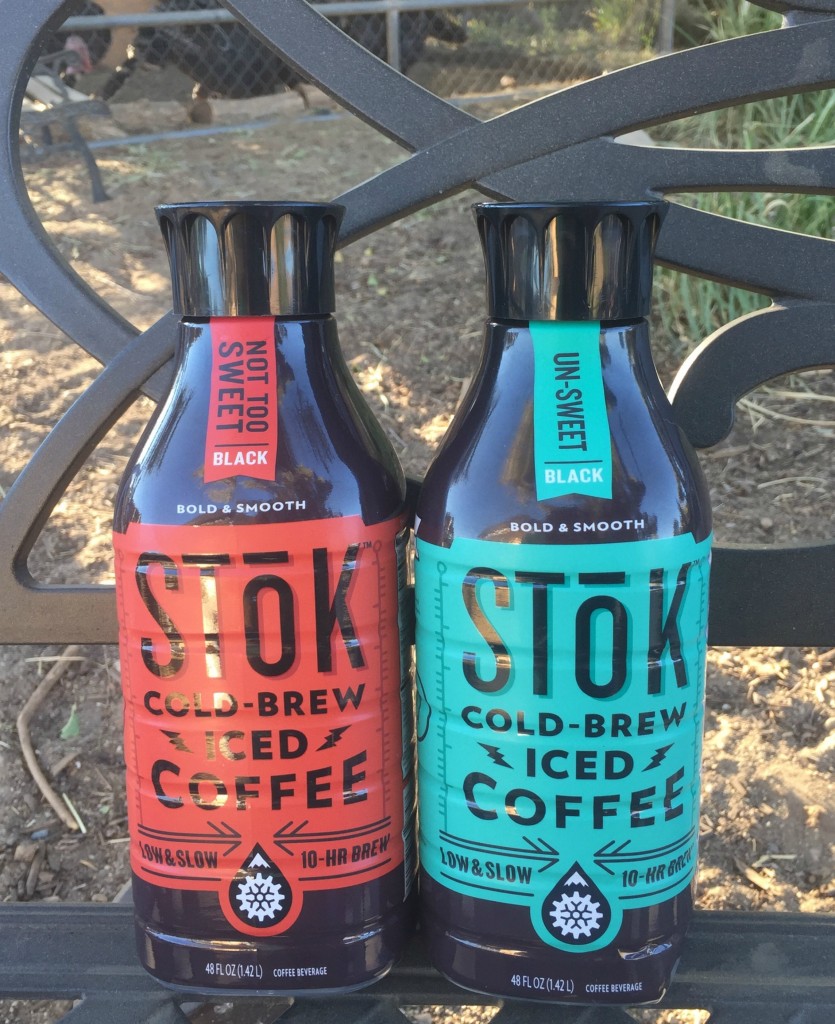
Keep in mind that a day at the farm is going to wear you down. There is so much to do and see that you’ll want to start off with some serious energy. You know I can’t do anything without my coffee… and we’ve been on the iced coffee kick this summer since it’s been so crazy hot. I brought some of my favorite SToK™ Cold-Brew Iced Coffee with me.
![]()
How to Make Goat Cheese
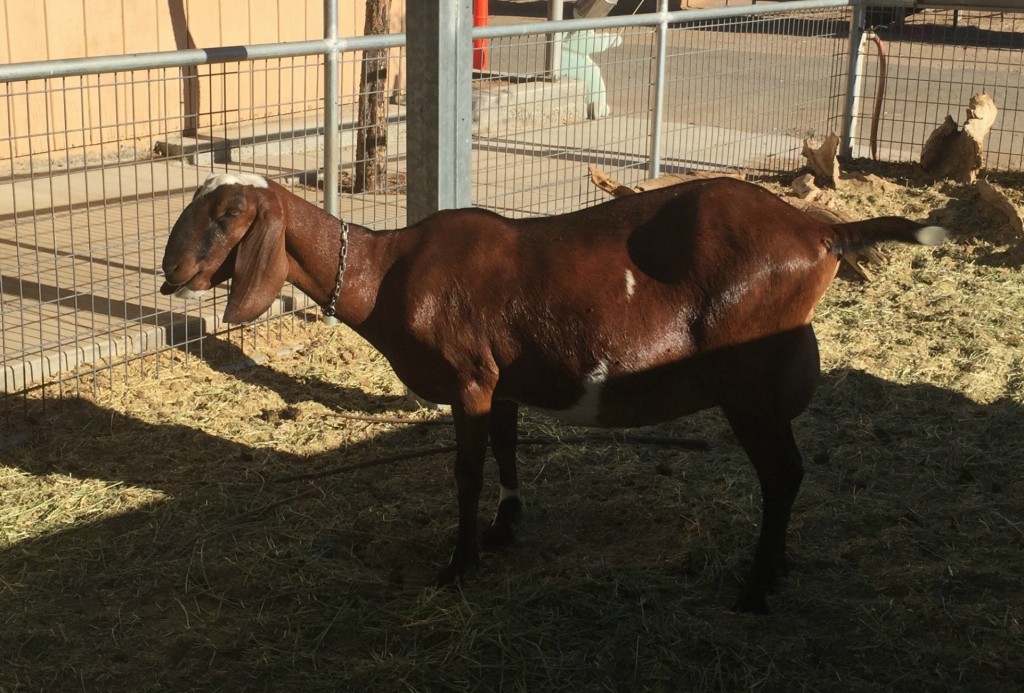
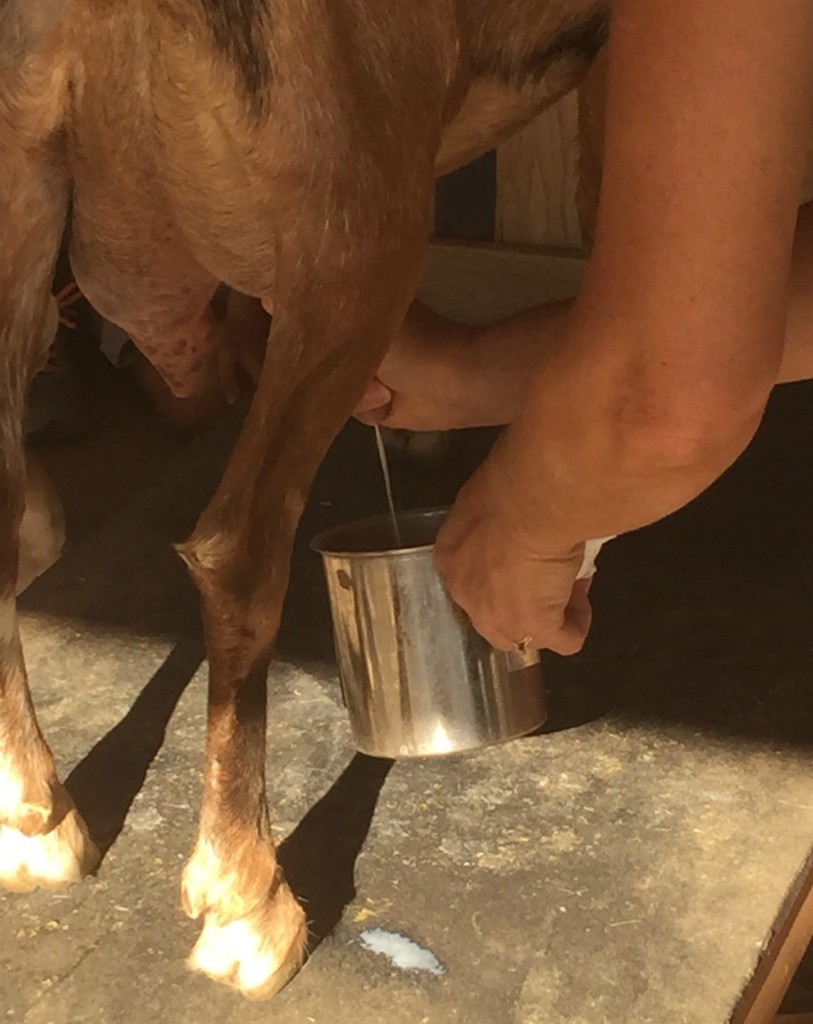
Step 1: Milk a goat.
I know, you are looking at me thinking I’ve lost my mind. But the best goat cheese comes from the freshest goat’s milk and there is no better way to get that than to milk your own goat. I get it… most of us don’t actually have our own goats, but it sure is nice when you have a friend who does. At the farm, the goats are milked twice a day and they do demonstrations every Saturday morning. They also sell fresh goat’s milk that you can either drink as is, or take home and make your own goat cheese.
If you really can’t find yourself a local goat, you can purchase goat’s milk at Walmart… seriously… I found some there the last time I was shopping. Just check out the milk aisle.
Milking a goat is just like milking a cow. Be sure to always sterilize the goat’s udders, your hands, and the container you are collecting the milk in.
Step 2: Add Culture
If you are using goat’s milk that has been refrigerated, let it come to room temperature before moving forward with making the cheese. The reason for this is that you will need to add a culture (starter) to it. The culture is similar to one you would use for yogurt or sourdough bread, but it’s expressively for making cheese. Once you add the starter to the milk, let it sit at room temperature for approximately 8 hours. You are waiting for the curds to separate from the whey.
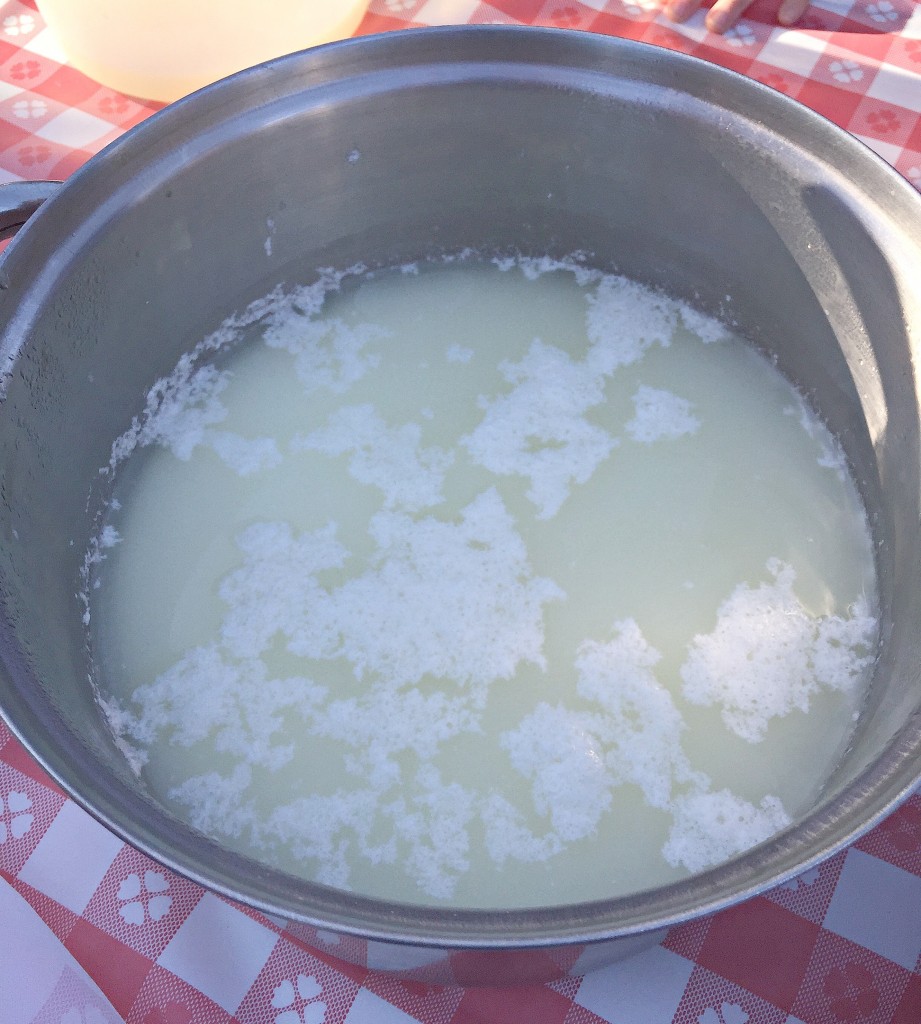
Step 3: Separate the Curds
When the curds are separating from the whey, you’ll want to line a metal colander with clean cheesecloth. If you are reusing your cheesecloth, make sure it has been bleached clean - you don’t want any detergent residue to interfere with your perfect cheese. Place the colander over a large pot or bowl.
Use a strainer and scoop the curds onto the cheesecloth so any excess liquid will drip below.
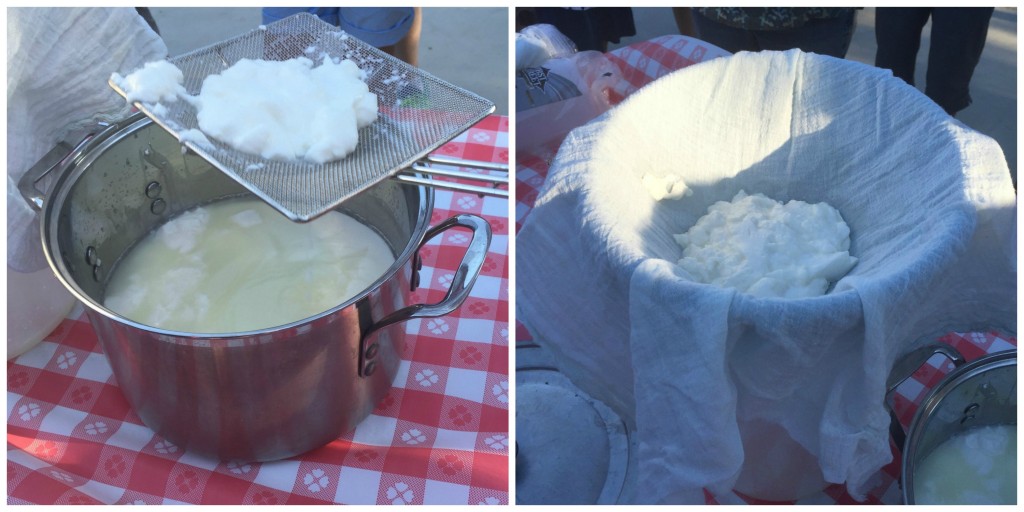
You’ll end up with a bowl (or pot) full of whey… something that you can absolutely use. Whey is great for cooking as it’s full of nutrients. You can use it to boil pasta in or use it as a base for soups.
Tie up the cheesecloth with the curds in it and you can chill it for another 8 hours. Just be careful not to do it for more than about 18 hours or the texture will change.
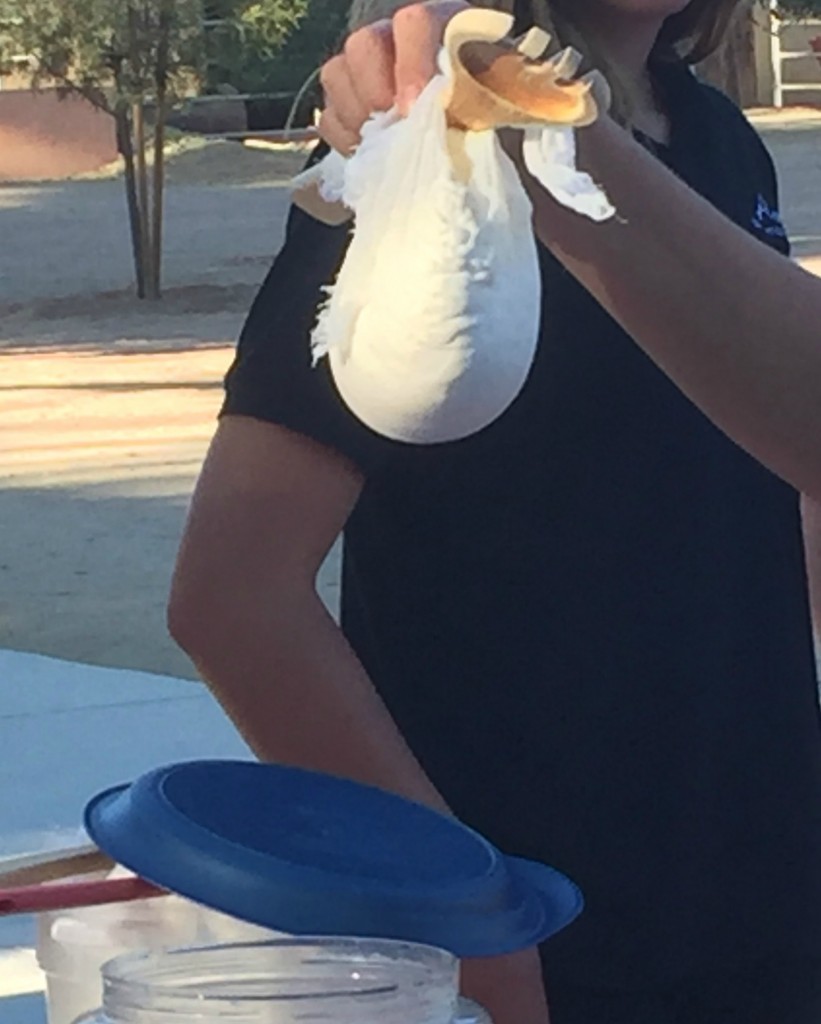
Step 4: How Do You Like Your Cheese?
When you unwrap your cheesecloth, you’ll have goat cheese. Yep… really! The only problem is that it probably won’t taste like much. The raw cheese isn’t very flavorful, not like the store-bought goat cheese. You’ll have to doctor it up a bit first.
You will need to salt your cheese in order to bring out the flavor that you’re used to. Pink Himalayan salt is the best for this since the salt will dissolve and you won’t get that salty flavor. After the salting, your cheese is ready to eat… unless you want to jazz it up even further.
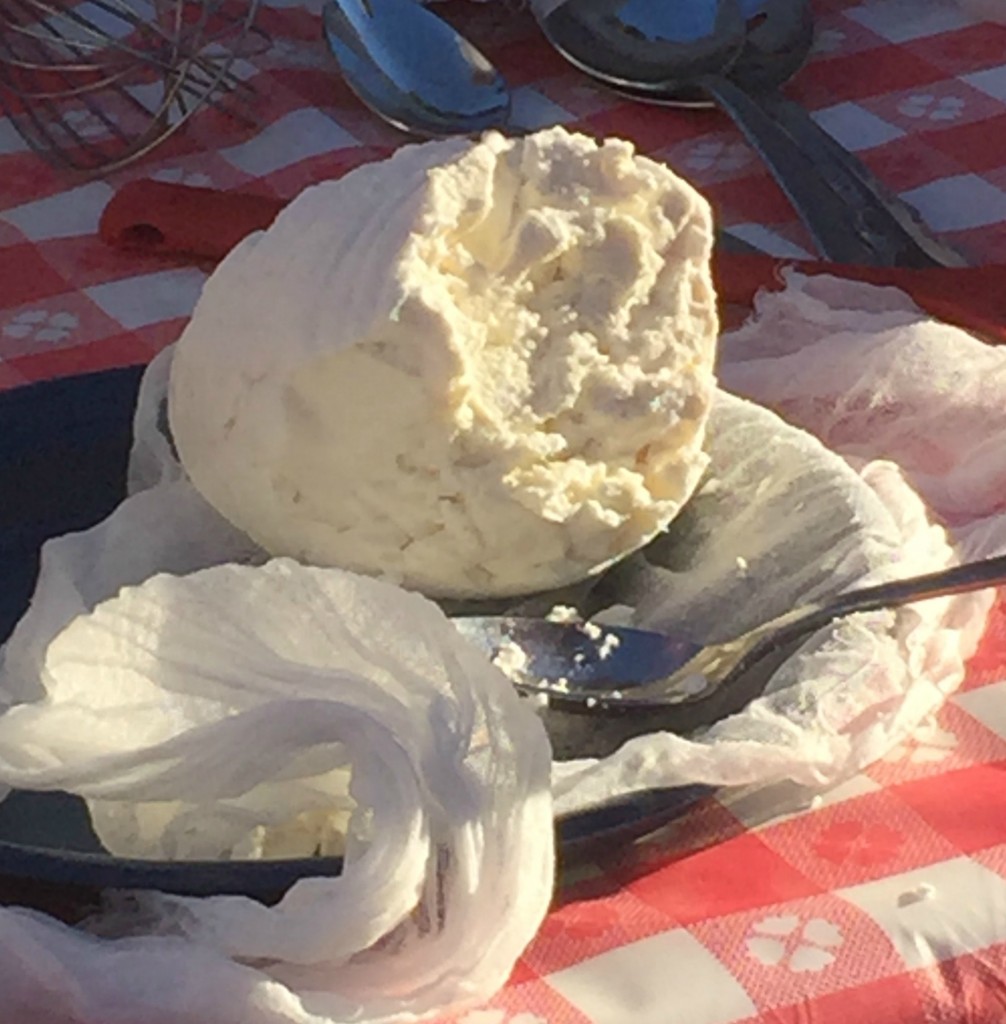
Your cheese can be placed in a mold so it looks like a log or a block of cheese. You’ll want to place your mold back in the refrigerator for another 8 hours or so until it hardens up. Then you can roll it in herbs or honey or whatever else you can get creative with. Personally, I just love a big jar of it to slather over crackers or toss in salads or omelets.
Cheese making is definitely an art and it’s one that I’m just starting to learn. There really isn’t anything better than farm fresh food.
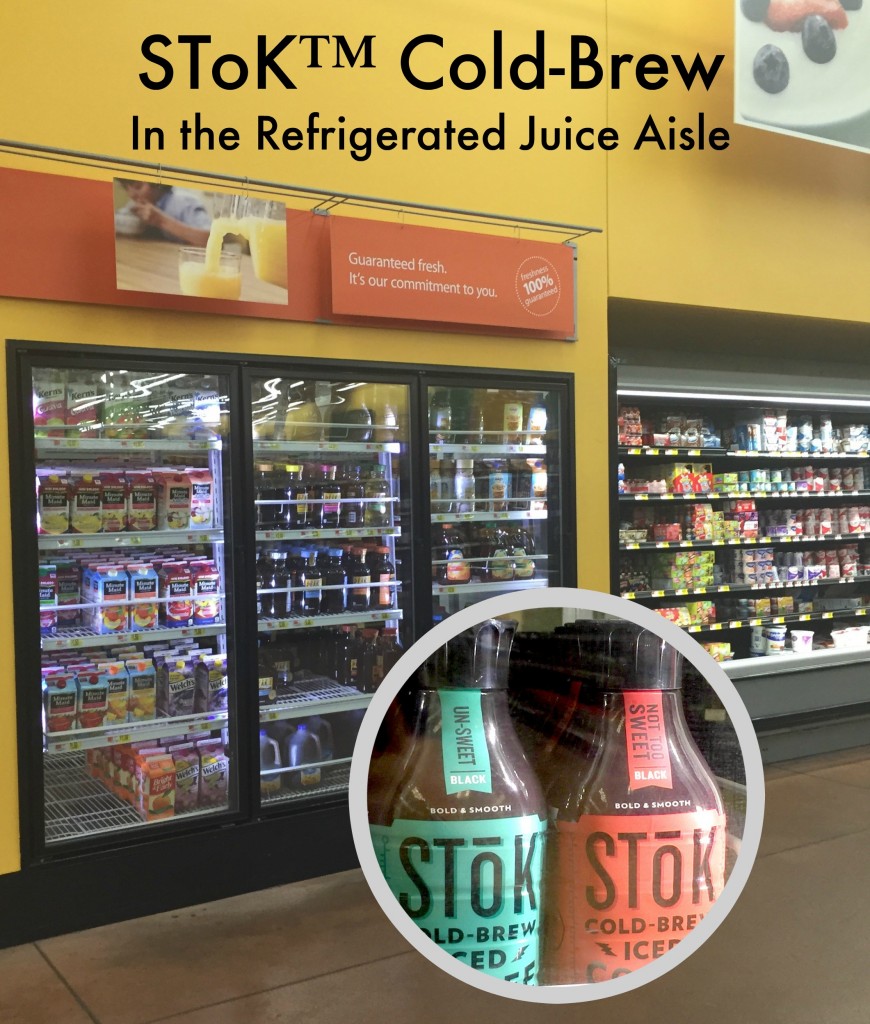
Check the outskirts of your town to see if they have a farm you can visit. You might even be able to get a lesson in milking or cheese making. And don’t forget to stock up on the most geeked out, creative and offbeat cold brew you can buy. Find SToK™ Cold-Brew Iced Coffee in the refrigerated juice section of Walmart. It comes in two flavors: Un-Sweet and Not Too Sweet. My husband is loving on the Not Too Sweet while I think the Un-Sweet is the most amazing drink ever. SToK™ comes in 48 oz. bottles and is slow-brewed (like all my crazy ideas) and doesn’t have any weird ingredients… just pure coffee. They use an Arabica Blend that tastes like you just brewed it at home.
Grab a bottle of SToK™ and go enjoy a day at Gilchrist Farm… or whichever local farm you end up at.
For more inspiration, follow SToK™ on Instagram, Facebook, and Twitter.


How fun! I’m more of a country girl, myself! I bet kids would love doing this, too!
Susan says
I once learned how to make tea at a tea farm. This looks a little more engaging, hahah. Going to have to make my own goat cheese sometime now 🙂